For a typical single-family home in the Cape Coral or Fort Myers area — say a three-bedroom, two-bath, single story — plan on the inspection taking around 45 minutes. The actual time depends on how many bathrooms and kitchens there are, how many HVAC systems the home has, , electrical panels, how many stories, the size and accessibility of the roof, and how easy it is for the inspector to reach everything they need to photograph. A manufactured home with no attic may be done in under half an hour. A two-story home with five bathrooms, multiple air conditioning systems, and a cramped attic full of storage could push closer to 90 minutes. Most homes fall somewhere in the middle.
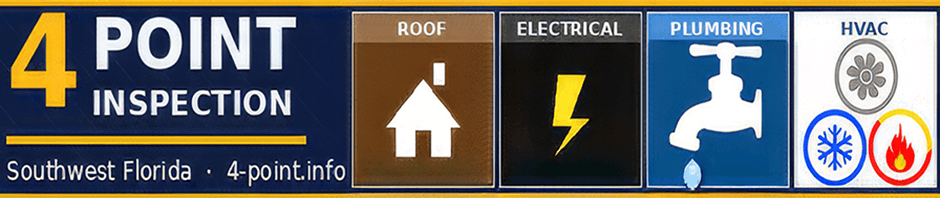
What the Inspector Will Do
The inspector will move through the home methodically, working through each of the four systems and taking photographs as they go. Every photograph becomes part of the official report that gets submitted to your insurance company, so expect the inspector to be thorough with their camera. Here is the general sequence most inspectors follow, though the exact order may vary:
Electrical — The inspector will locate your electrical panel, open the front cover, and then remove the dead front panel to expose the interior wiring and breakers. They will photograph the panel label, the breaker layout, the wiring connections, and the overall condition. They are looking at the brand of the panel, the type of wiring present, the amperage, and whether there are any visible issues such as double-tapped breakers, scorching, corrosion, or improper modifications. The panel cover will be put back in place when they are finished. This portion of the inspection is done carefully and deliberately — the interior of a live electrical panel is not a place to rush.
Plumbing — The inspector will check under every sink in the home, photograph toilet supply lines, and examine any laundry hookups or utility sinks. They are identifying the type of supply and drain piping — copper, PEX, CPVC, galvanized, cast iron, polybutylene — and looking for visible signs of leaks, corrosion, or water damage. The water heater gets particular attention. The inspector will photograph the data plate to determine its age, check its overall condition, and document whether a temperature and pressure relief valve is present with a properly installed discharge pipe. If the water heater is in the attic, the inspector will need to access the attic to evaluate it there.
HVAC — The inspector will photograph your air handler — which may be in a closet, garage, or attic — and your exterior condensing unit. They are documenting the age and condition of both, looking for signs of leaks, corrosion, or water damage around the air handler, and confirming that the home has a functioning central heat source. If the equipment has a service sticker from an HVAC company, the inspector will note the last service date. If your air handler is in the attic, this is typically handled at the same time as any other attic work to avoid multiple trips up and down.
Roof — The inspector will photograph the exterior of the home from multiple angles to document the roof covering, its overall condition, and any visible damage or wear. They will also scan interior ceilings for signs of active or previous water intrusion — staining, discoloration, bubbling paint, or soft spots that could indicate a leak. Depending on the roof type, pitch, and accessibility, some inspectors will get on the roof itself while others will evaluate it from the ground or using other methods. The inspector is estimating the roof’s remaining useful life based on the material type, its apparent age, and its current condition.
Should You Be There?
You are not required to be present, but it is a good idea if you can manage it. Being home means the inspector can ask you questions in real time — when was the roof replaced, who did the electrical work, is that stain on the ceiling from an old leak that was already repaired — and you can point them to documentation or permits without the back-and-forth of phone calls and emails after the fact. If the inspector finds something that may be an issue, you will hear about it on the spot rather than reading about it in the report for the first time.
If you cannot be there, make sure whoever is letting the inspector in — a neighbor, a property manager, a tenant — knows where the electrical panel is, can provide access to the attic if needed, and is aware of any pets, alarms, or locked gates.
Pets
If you have dogs, keep them secured inside or in an area away from where the inspector will be working. The inspector will be moving through the interior of the home opening cabinet doors and accessing closets, and they will also be outside in the yard photographing the roof, the condensing unit, main water shutoff, main electric disconnect, and the exterior walls. Gates and screen doors will be opened and closed throughout the process. A dog that is protective of its home or prone to bolting through an open door needs to be accounted for before the inspector arrives — not after. Let the inspector know about any pets when you schedule the appointment so there are no surprises on either end.
Gates and Screen Enclosures
If your yard is fenced, make sure the gate is unlocked. If you have a pool cage or screened lanai, make sure the screen doors are accessible. The inspector needs to reach the rear and sides of the home to photograph the roof and exterior, and they will need access to the outdoor condensing unit, which in many Southwest Florida homes is located behind a fence or inside a screened enclosure. These are small things, but a locked gate with no key left out can turn a routine inspection into an incomplete one.
After the Inspection
When the inspector has finished, they will compile the report — completing the form, attaching the required photographs, and signing and dating the document. Most inspectors deliver the completed report as a PDF via email, typically within 24 hours for a straightforward inspection. Some deliver same-day. The timeline can vary depending on the inspector’s schedule, the size of your home, and workload, but next-business-day delivery is standard across the industry. Whether or not they complete your form by hand or an app can also play a factor. An inspector using an app can generate a report much faster than one who does it manually, however that speed often comes at a cost by sacrificing quality of the images within the report.
When you receive the report, forward the PDF directly to your insurance agent by email. Do not print it out and bring a paper copy to the agent’s office. Insurance companies process these reports digitally, and a printed copy will almost always result in your agent needing to contact the inspector for the electronic file anyway. Save everyone the extra step and send the PDF.
If Something Comes Back Unsatisfactory
It happens. Sometimes the inspection reveals an issue that needs to be corrected before the insurance company will accept the report. In many cases the fix is minor and relatively inexpensive — a missing TPR discharge pipe on the water heater, a double-tapped breaker in the panel, a small plumbing leak under a bathroom sink. These are the kinds of things that a licensed contractor can typically address quickly and affordably.
In other cases the issue is more significant — a Federal Pacific or Challenger electrical panel that needs to be replaced, polybutylene plumbing supply lines that the carrier will not insure, or a roof that has reached the end of its useful life. These are larger projects with real costs, but they are also conditions that affect the safety and insurability of your home regardless of whether an inspection identified them.
Once the issue has been corrected, most inspectors offer a reduced rate to come back out, verify the repair, update the report, and reissue it with a current date. You should not have to pay for a full inspection a second time just because one item needed to be addressed. Ask your inspector about their policy on report updates before the initial inspection so you know what to expect if something does come up.
Timing Your Inspection
If you are scheduling a 4-point inspection for an insurance renewal, do not wait until the last minute. Give yourself at least 30 days before your renewal date. This allows time for the inspection itself, time to receive and review the report, and — if something does need to be repaired — time to get the work done and the report updated without a gap in your coverage. Homeowners who schedule their inspection the week before their policy expires and then discover an issue are left scrambling, and that urgency rarely works in anyone’s favor.
If you are shopping for a new policy or switching carriers, the same logic applies. Get the inspection done early in the process so you know where you stand before you are committed to a deadline.